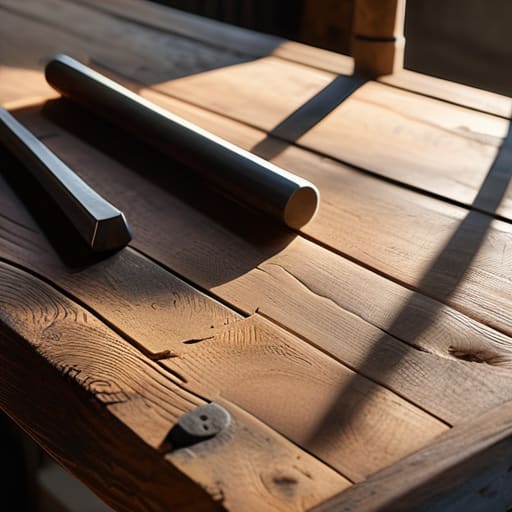

I was standing in the middle of a rain-slicked alleyway in Bushwick last Tuesday, my Leica hanging heavy around my neck, when I spotted it: a massive, solid oak door leaning against a brick wall, half-hidden by discarded crates. Most people would see a piece of debris destined for a landfill, but as I looked through my viewfinder, I saw something else entirely—a foundation. There is a common misconception that you need a pristine, expensive slab of maple to build a proper workspace, but that’s a lie that keeps too many creatives stuck with flimsy, store-bought tables. The truth is, making a workbench from a door isn’t just a budget hack; it’s about reclaiming a piece of history and giving it a new purpose in your creative sanctuary.
In this guide, I’m stripping away the fluff and the overly polished DIY nonsense you see on social media. I’m going to walk you through the gritty, practical reality of sourcing the right timber, stabilizing a heavy frame, and ensuring your new station can actually handle the weight of your projects. You’ll get my honest, no-nonsense approach to making a workbench from a door that is built to last, regardless of whether you’re a photographer, a maker, or just someone looking to build something real.
Guide Overview
Tools & Supplies
- Drill/Driver for assembly
- Saw for cutting legs/supports
- Measuring tape for accuracy
- Sandpaper for smoothing edges
- Old solid core door (1)
- 2×4 lumber (4-6 pieces)
- Wood screws (1 box)
- Wood glue (1 bottle)
Step-by-Step Instructions
- 1. Before you even pick up a saw, you need to sit with the door. I know it sounds strange, but you have to feel the weight of what you’re working with. Clear a space in your workshop—or wherever your makeshift studio is—and strip away any loose debris or old, flaking paint that might mess with your tools. If the door has glass panels, be incredibly careful; I’ve seen too many projects end in a mess of shards. If you’re keeping the glass, reinforce it; if not, remove it entirely to expose the raw, skeletal frame underneath.
- 2. Once the door is prepped, it’s time to find its foundation. A door by itself is just a slab of history, but to make it a workbench, it needs legs that can handle the grit of real work. I usually hunt for heavy-duty timber or even old industrial metal trestles at local salvage yards. You’ll want to measure the height so that when you’re leaning over your camera gear or a piece of wood, your back isn’t screaming at you. Aim for a height that feels natural to your body, much like finding the right eye level for a shot.
- 3. Now, we get into the structural bones. You’ll need to secure the door to your chosen base, and this is where the character of the wood really matters. If you’re working with a solid wood door, use heavy-duty L-brackets or even custom wooden cleats to marry the door to the frame. I prefer using screws that are long enough to bite deep but not so long that they pierce through the surface and ruin the aesthetic you’re trying to preserve. It’s a delicate balance between strength and soul.
- 4. If your door is a hollow-core variety—the kind you find in most modern apartments—you’re going to need to add some substance. You can’t exactly hammer a nail into air. I recommend taking some scrap plywood or even old planks and securing them to the underside of the door. This creates a “sub-top” that gives the surface some much-needed structural integrity. It turns a flimsy piece of interior hardware into a platform that can actually support the weight of your tools.
- 5. Sanding is where the transformation really happens. You don’t want to sand away the history—the dents, the scratches, the marks of a previous life—but you do want to get rid of the splinters. Start with a coarse grit to smooth out the rough edges and work your way up to a fine finish. I like to leave certain areas slightly weathered; it’s that narrative realism that makes the piece feel like it belongs in a Brooklyn loft rather than a showroom.
- 6. The final touch is the seal. Depending on how much you plan to actually abuse this thing, you’ll want to choose your finish wisely. If you want to keep that raw, matte look, a simple wax or a light oil works wonders. If you’re going to be spilling ink or solvents, a heavy-duty polyurethane is your best friend. Apply it in thin, even layers, letting the light catch the grain just right, ensuring that the door’s new chapter is protected for years to come.
Upcycling Interior Doors Into Work Tables With Soul

When you’re out scouting abandoned buildings or browsing local salvage yards, you start to see doors differently. They aren’t just barriers; they are slabs of history waiting for a second act. Upcycling interior doors into work tables is about more than just saving a few bucks on materials; it’s about bringing a sense of character to a workspace that usually feels sterile and industrial. I always look for solid wood cores—the kind that have survived decades of foot traffic—because they carry a weight and a resonance that modern, particle-board alternatives simply can’t mimic.
However, a door isn’t inherently built to withstand the rhythmic percussion of a mallet or the heavy vibration of a drill. If you’re planning on serious projects, you have to consider how to reinforce a door for heavy tools. I usually recommend sandwiching the door between two layers of high-grade plywood or attaching a stout, internal bracing system. This prevents the wood from bowing under pressure over time. It’s that extra bit of structural integrity that transforms a piece of reclaimed history into a reliable, lifelong companion for your creative process.
How to Reinforce a Door for Heavy Tools
If you’re planning on more than just light sketching or light assembly, you have to respect the physics of the build. An interior door, no matter how beautiful its grain, wasn’t designed to withstand the rhythmic impact of a mallet or the weight of a heavy cast-iron drill press. When it comes to how to reinforce a door for heavy tools, the secret lies in the skeleton beneath the surface. I usually recommend sandwiching the door between two layers of 3/4-inch plywood or adding a thick layer of MDF to the top. This adds much-needed mass and prevents that dreaded “bounce” when you’re working hard.
Beyond the surface, your DIY door workbench frame construction needs to be rock solid. I’ve found that a simple four-legged frame often lacks the lateral stability required for serious shop work. Instead, aim for a heavy-duty trestle style or incorporate cross-bracing along the lower rails. This turns a delicate piece of repurposed architecture into a legitimate piece of budget workshop furniture DIY that can actually hold its ground. It’s about finding that balance between preserving the door’s aesthetic soul and giving it the structural backbone it needs to survive the grit of a working shop.
The Fine Print: Small Details That Keep the Project From Falling Apart
- Don’t underestimate the importance of a solid substrate. If you’re using a hollow-core door—the kind you find in most modern apartments—you’ll need to bridge that empty space with plywood or MDF before you even think about mounting a vise. Without that internal weight, your workbench will feel more like a cardboard box than a tool station.
- Mind the grain and the grit. Since I spend so much time looking through a viewfinder, I’ve learned that texture tells a story, but in a workshop, it can be a nuisance. Sand the surface down until it’s smooth enough to not snag your skin, but leave enough character so that the door’s history isn’t completely erased by a thick coat of industrial epoxy.
- Leveling is your best friend and your worst enemy. Old doors are rarely perfectly flat; they’ve spent years settling into their frames. When you’re setting your new workbench, use shims to compensate for those slight bows. A workbench that wobbles isn’t just annoying—it’s a liability when you’re trying to do precision work.
- Think about your mounting points. If you’re planning to hang heavy clamps or even a small tool rack off the side, don’t just screw into the thin veneer. Aim for the solid wood stiles at the edges of the door. It’s the difference between a rack that stays put and one that rips a chunk of history right out of the wood.
- Seal it like you mean it. A workshop is a chaotic place, full of spilled oils, sawdust, and the occasional coffee mug. Apply a heavy-duty polyurethane or a hard wax finish. You want to protect the wood from the mess of the present without losing that raw, urban aesthetic that made you choose this door in the first place.
The Final Frame
Building this workbench is more than just a weekend project; it’s about the careful balance of structural integrity and character. By selecting a solid door, reinforcing the core to handle the weight of your heavy tools, and treating the surface to honor its original texture, you’ve created something far more substantial than a mere piece of furniture. You haven’t just assembled a workspace; you have engineered a foundation that respects the history of the materials while providing the stability needed for your own creative pursuits. It’s the marriage of that old-world grit and modern functionality that makes this build truly stand out in a cluttered garage.
As I sit here at my own desk, surrounded by the heavy glass of my vintage Leica lenses, I’m reminded that nothing is ever truly finished—it’s just waiting for the next chapter. This workbench will eventually bear the scars of your labor: the accidental saw marks, the spilled ink, and the deep grooves of a thousand projects. These aren’t defects; they are the living history of your craft. So, go ahead and get to work. Let the wood take its shape, let the dust settle, and most importantly, let this piece become a silent witness to the stories you are about to create.
As you start getting into the nitty-gritty of the build, you might find yourself craving more than just technical specs—you’ll want that sense of shared inspiration that comes from seeing how others navigate the creative process. If you’re looking to connect with people who value the same unconventional approach to making that we do, I’ve found a lot of unexpected value in checking out this California social community. It’s a great way to find a bit of creative kinship when you’re deep in a solo project, reminding you that even the most solitary workshop sessions are part of a much larger, global conversation.